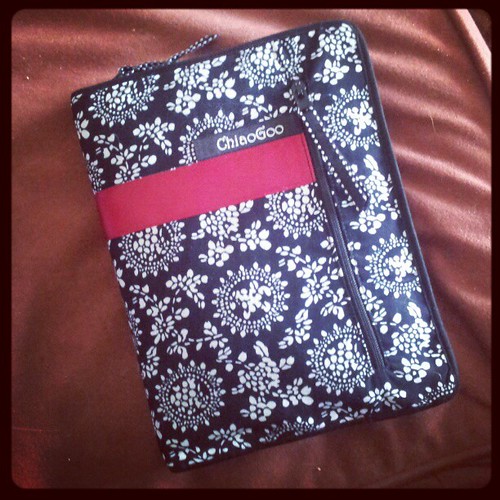
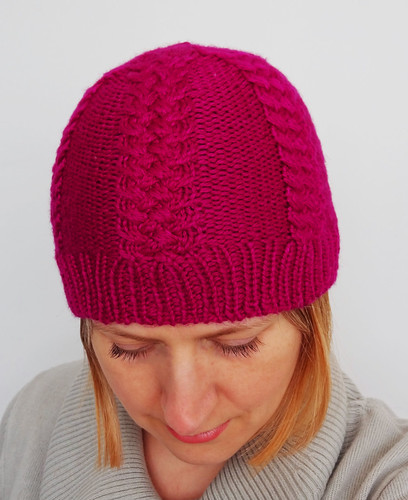
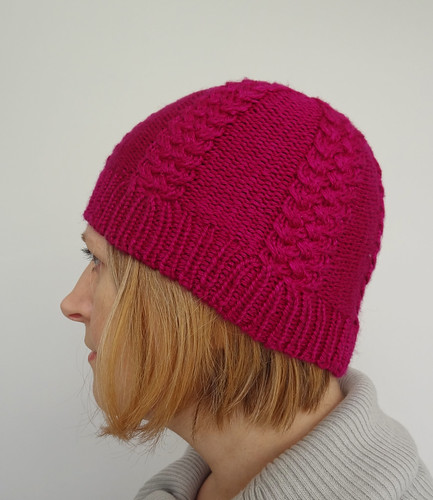
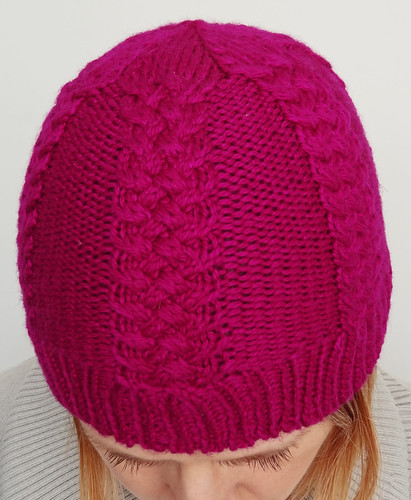
As promised on Friday, I have taken some photos of my new ChiaoGoo Twist Interchangeable Needle Set, and can now give you my view of it.
When I started knitting in 2008, I set out using Pony needles, as they were the ones available everywhere. As I got more interested in knitting over the next few months I discovered the wonderful KnitPro Options Interchangeable needles. These needles didn't cost the earth, were compact, pointy and pretty. As I needed each size I bought it, which meant the cost of each size wasn't much greater than the Pony standard needles.
The KnitPro Options were incredibly good needles for a starter to use. I used them happily until last year, when as I started knitting more and reading more I decided to try Addi turbos. I really liked them for their slickness and comfort. However as they were fixed I needed lots of different cable lengths. After a while collecting these needles, Addi brought out an interchangeable range, the Addi Clicks, which I decided to try. Whilst the Addi Clicks had the slickness of the fixed circulars, the join wasn't as perfect as I hoped. The connection caught on my finer yarns. They were good when knitting with thicker yarns, but I do quite a lot of lace knitting in finer weight yarns and the set would probably create difficulties. I decided I wouldn't bother getting that set.
My love of lace knitting led me to try ChiaoGoo Lace Circulars. I really really liked these needles. The cable didn't kink and coil up on itself, the points were incredibly pointy and the finish was lovely. I started to collect these circulars and
then the interchangeable version of these needles became available in the UK. I bought 4mm needle points and a short cable and tried the needle. After my trial I decided I wanted to buy the whole set. You can also buy the small part of this set, the large part or individual needle tips and cables. I decided that I didn't want to get the needles piecemeal as that can add up over time, in terms of postage if nothing else. I also decided to go the whole hog as this year it is my 40th birthday and I decided to treat myself to something that I love that can be used every day and feel special, much in the same way that you might have a nice watch or jewellery. It might seem a strange treat to a non-knitter, who might stumble over this blog, but we know what a sensible and luxurious treat to myself this is, don't we?
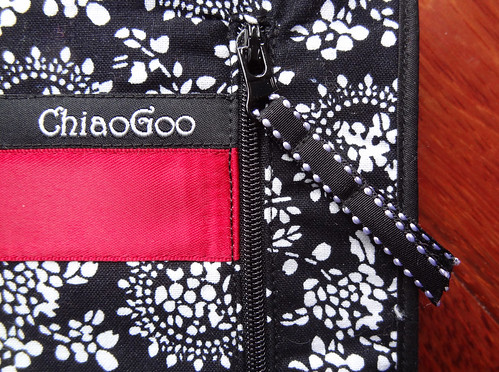
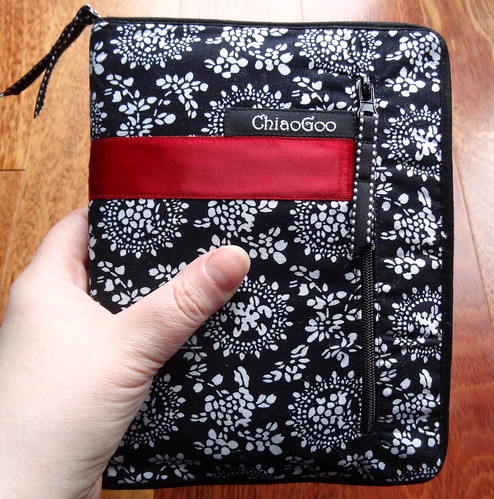
The set comes wrapped in a nice black and white cotton case, with a red ribbon running around it. The fabric isn't the hardiest of material, but it isn't that flimsy either. The front of the set has zipper pocket with a nice ribbon zipper pull. In this front pocket is room for all the things (apart from the needles) that come with the kit.
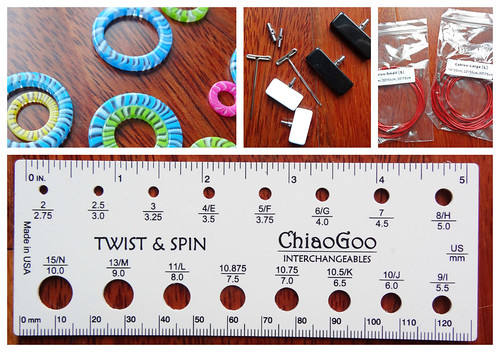
There are some lovely stitch markers in various sizes, from large to tiny. There are stoppers for the ends of the cables, to enable you to remove the needles for other projects without losing your stitches. Also included in the top middle photo are the cable tighteners (they look like T Pins) and cable connectors so that a longer cable can be created from two smaller sizes. The cables come in two sizes, small and large, to be used according to the needle size and there is a needle gauge.
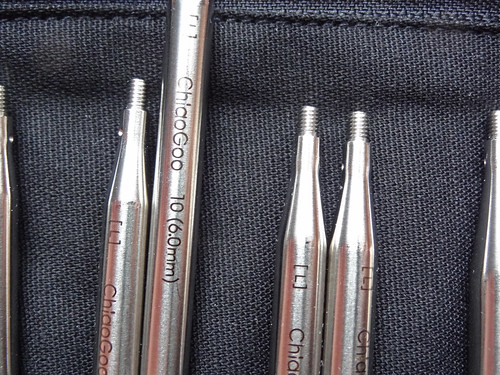
The needle gauge is a bit redundant because the needles are all etched with size, along with whether a small or large cable is needed.
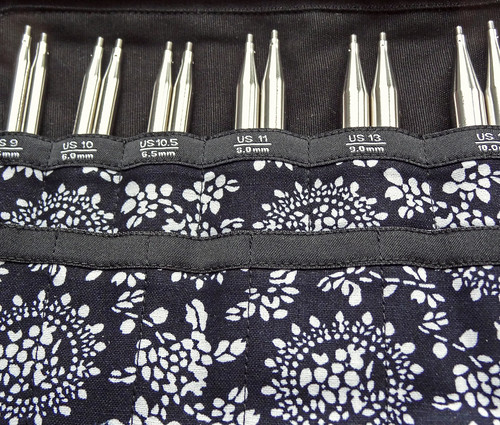
In addition to the numbers engraved on the needles, each pair of needles has it's own embroidered pocket.
As you can see there are pockets offset and below the labelled ones that can be used for other needles or crochet hooks. I am tempted to add my KnitPro Options needles to this set, in which case the needle gauge might come in handy, for something other than calculating knitting gauge. Newer KnitPro Options are engraved with the size, but my older ones aren't, and even the newer needles struggle to keep the needle size clear enough to read.
There is certainly plenty of room for the other interchangeable needle tips I have in this case.
There are 13 pairs of needle tips ranging from 2.75mm/US2 to 10mm/US15, which is the full set. This is an improvement over the KnitPro Options which has 3mm as their smallest interchangeable needle tip, though the KnitPro Options go up another couple of sizes beyond the 10mm size of the Twist tips.
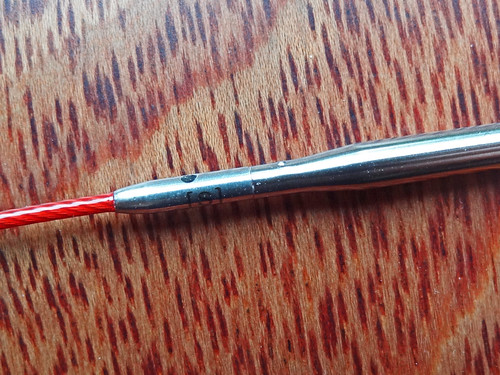
As I mentioned above, Twist needles have cables of different sizes, unlike the KnitPro Options which only require one type of cable connector. Though this seems pointing, I think this sizing is probably one of the reasons the join between cable and needle is so smooth in this set.
As you can see, the connector has the size engraved on it, like the needle does, so I don't think matching up cable sizes will be too tricky, but it does mean you have more cables if you want multiple projects on the go than you would if using KnitPro Options. In addition to having S or L engraved on the connector, the length of the cable is also engraved (on the opposite side to the one shown in the above photograph). This means if a pattern specifies a particular cable length, you can find the right one straight away.
You can also see on the above photo, the hole in the connector part of the cable. This hole is used to tighten up the connection and you find the same thing on KnitPro Options. In the KnitPro Options I have used this to tie the end of a lifeline to, whilst knitting a row. It saves sewing a life line through, a stitch at a time. ChiaoGoo have recognised this technique, which I read about on a blog years ago, as being very clever and marketed this as an idea inherent in their design!
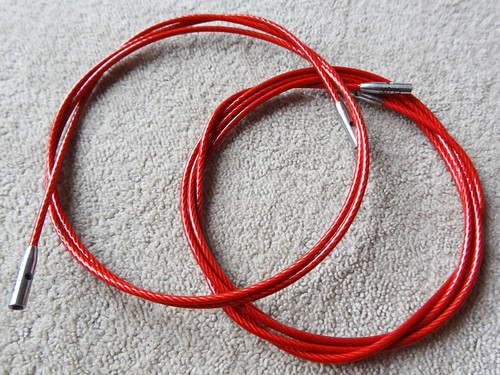
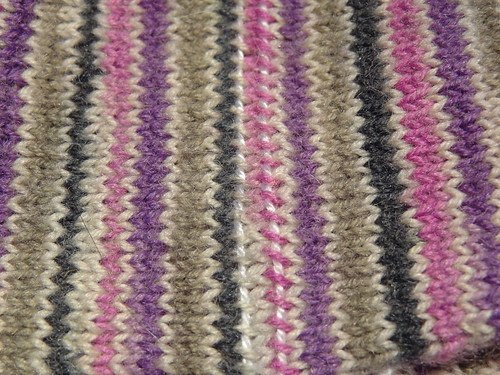
One of the things I loved initially about the ChiaoGoo Lace needles were the the fabulous red cables. The cables are made from twisted steel wires that are coated with plastic. This makes the cables very strong and it means they don't twist up on themselves or require soaking to straighten out. Having these cables with this set was a real deal breaker for me as I believe part of the reason KnitPro Options untwist at the connection, is because the cable twists up and unscrews itself from the needle. This drove me nuts, admittedly not nuts enough to soak my cables in warm water every time I used them, but nuts nonetheless.
The cables are not only clever and strong, but rather pretty too! The needles are fairly attractive too, but they are really hard to photograph because of reflections off the metal. I'm sure a professional could do it, but I'm only an amateur!
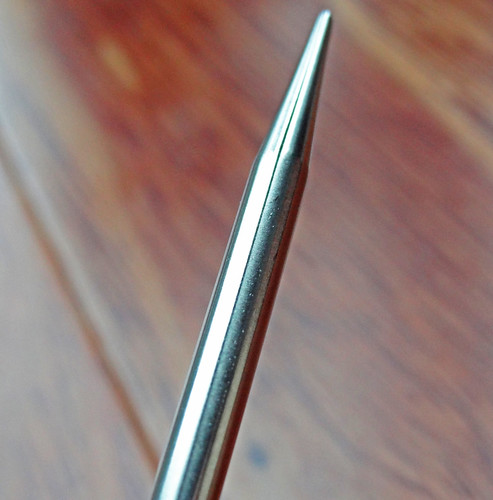
The above needle is 3.75mm, to give you an idea of scale. As you can see the tip is
very pointy, which I love, but I know that not everyone does. I prefer to have pointy tips because I do lots of lace and find them easier when cabling without a cable needle (which tightens stitches up). If you you push the tip of the needle with the pad of your finger tip to move your stitches up the needle, you probably don't want these tips as they would inflict significant pain on your poor finger.
The surface of the metal is not as slick as the Addi Turbo needles. It's hard to see on the above photo, but there is a very slightly textured finish to the metal of the needles. It gives them a sort of satin finish. This means you can knit quickly and stitches slip up and down the needle quite easily, but the stitches don't fly off the tips in a hurry either, which is important in lace and cable.
I hope this review will help other knitters decide whether this set will be appropriate to their knitting style. I know these tips would not suit everyone, but for me, they are perfect, and the only thing that would make me happier is having the case made in a sturdier fabric, as I think it will only last 5 years or so. I don't think that's too much a cause for complaint if that is the only thing I can find to annoy me, do you?