Showing posts with label We Did It Wednesday. Show all posts

Wednesday, 7 August 2013

Wandering Wildflower Cowl - And A Little Treat For You

This is a project, that I love.  I am so happy with how it turned out.  Starting with a great yarn, always helps though!  The yarn in question is Countess Ablaze Count Cashmerino High Twist in a one of a kind colourway called "Finish The Deal".  This yarn couldn't have been more "for me" if the dyer had tried.  It has purple, teal, pink, green and it is in my favourite base of merino/cashmere/nylon, that I used in my Striped Shawl, in the Grey Skies Over Manchester colourway.


I snapped up this little beauty as soon as I saw it, and really wanted to cast on with it, straight away.  The trouble with variegated yarn is that it can look a little odd when knit up into things.  I wanted this yarn to shine and I wanted to wear it next to my skin.  So I started looking for the right pattern.  I eventually found it in Wandering Wildflower, a cowl pattern by Lara Smoot.  This pattern was pretty much designed for this type of yarn and I started knitting it fairly quickly.

I cast on, joined in the round and started knitting.  I got this far.


I then realised that I'd twisted the stitches when I joined in the round. Doh!!!  I had been so careful too.  Ah well, these things happen, and as I enjoyed knitting it so much, I didn't really mind.  I ripped back and started again.  This time I didn't join in the round until I'd knitted a few rows.  I left a longer tail than normal when I cast on and I used it to sew up the gap at the start of the cowl.


You can barely see it.  When I knit this again, I think I'll use this same technique.  Yes, you read that right, I am absolutely positive I will knit this pattern again.  It is perfect for the sock yarn I've got that I've picked up because I love the colours and don't want to wear as socks because it's too beautiful.  These skeins don't always work well as shawls, but as this pattern, they are glorious.


As you can see, the pattern uses sections of short row shaping, interspersed with eyelet rows.  The short row sections move round so you end up with a fairly straight sided cowl.

When blocking this cowl I decided to try a little experiment.  I bought some foam pipe insulation and used a piece at either side of the cowl, where normally a hard fold would be created when blocking something knit in the round.

Wandering Wildflowers 02

I used blocking wires along the long edges and pinned the whole thing to my foam blocking boards.  I also pinned to the foam tubes.

Wandering Wildflowers 01

It worked brilliantly and I'll definitely be using it again, as I knit lots of things in the round.  The tubes only cost a few pounds and I bought around 2m worth.  I bought it from here, but I imagine it's easy to pick up at a DIY store.

The cowl is beautiful, and has no folds from blocking.  It drapes elegantly and I am incredibly pleased with it.

Wandering Wildflowers 07

It's a perfect length to wear it as a scarf, so you can show off all your lovely yarn and knitting.  When doubled up, which is my favourite way to wear it, you have an elegant necklace length cowl.

Wandering Wildflowers 08

Then, of course, you can go for tripled up and that keeps your neck toasty warm in cold weather.

Wandering Wildflowers 09

I like how, when the cowl is doubled and tripled the reverse of the stocking stitch knitting is revealed. Reverse stocking stitch gives more "pops" of the variegated colour.

As you might gather, I adore this project.  I even started messaging the designer, and as a result I have a little gift to you!  Lara has very kindly offered to give one of my blog readers, or podcast listeners, a choice of any of her lovely patterns.  All you have to do is go to her pattern store and take a look at what pattern you would like to win, there are other patterns as fabulous as this one, so you will have plenty of choice.  Then you need to go to my Ravelry group and enter your preference in this thread.  As this giveaway is open to both blog readers and podcast listeners I will leave the thread open until I record my next podcast in around 3 weeks time.  This gives everyone a good opportunity to listen to the podcast episode and to see this post.

You must be a member of the Ravelry Group to win this contest.  I hope this isn't a major hardship, you don't have to join in on the other threads, but it would be lovely if you did, especially as we have the Crafting Library KAL coming up.  We are already discussing patterns and yarn choices over there, so we'd love to hear if you are planning on joining in.

Tuesday, 8 January 2013

Beyond Cute

One of the things I knitted for Christmas, was a gift for my niece.  My SIL had commented on how quickly little E was growing out of things, especially the cardigan given to her when she was born.  So of course I decided another cardigan was in order, in time for Christmas.

I had favourited on Ravelry a gorgeous cardigan pattern.  It was a free one, but sadly it was for newborns.  Looking at this pattern led me to discover a re-visited version that ranged from newborn to 2 years old.  It was a paid pattern but it was an incredible bargain in my view.  Beyond Puerperium by Kelly Brooker is $5/£3.19 and for that price you get 7 sizes in 3 different weights of yarn.  In my mind, that is a complete bargain, and it will probably get made over and over again, especially when you consider how cute it is!

Beyond Puerperium

Isn't she adorable?  Yes, she is even cuter in person.  I know I'm biased, but apparently complete strangers come up to my brother and SIL in the street and tell them she is cute too, so I think it must be true.

I made the 6-12 month size of cardigan.  She is just over 6 months old now and it seems to fit her well, but has plenty of room to grow into.  Apparently, more cardigans in bright colours are just what my niece's wardrobe requires, so I think I'm going to get plenty of use out of this pattern.

Here's a picture of the cardigan lying flat so you can see how it works.

Beyond Purple 01

I used Sirdar Snuggly DK in colour 197 for the main body of the cardigan.  The lighter purple stripes are made using Rico Design Baby Classic DK in colour 9715 (Elieder) which was left over from the Wee Hat I made in November.  I learnt how to do intarsia, set into a row like this, whilst doing the Spectra scarf, and it works really well.  In this case, it means the change in colour isn't on the open edge of the cardigan, but set inside the main body of the knitted fabric.  I think it makes things neater.

Beyond Purple 02

I love the little details in this pattern.  It's deceptively simple, but the garter stitch edges on the cuffs, neck and hem add contrast.  The neck is nice and wide, so it doesn't pull or rub against the baby no matter how active she is.  The buttons fasten nearly on the side seam, which means the buttons don't dig in when the baby is on her stomach.  Because I knew the buttons were going to be tucked away, I chose some fun ones.

Beyond Purple 03

I'm so pleased with this project.  I think it is pretty and very wearable for an active baby and whoever dresses her in it!

Thank you to my dear SIL, Emma, who let me use the photo of my niece in her cardigan.  It's a wonderful photo which not only shows off her wardrobe, but also how engaging my niece is too.  I am going to have so much fun knitting for my niece over the coming years.  I'm so lucky to have family who enjoy and use my handcrafted gifts.

Friday, 4 January 2013

Spectra

When you find yourself blogging about a project that you finished in October, you may begin to worry about being behind in the update department.  I, however, do not worry about such things.  If I were to worry about such things I would have worried myself into oblivion a long time ago.  I simply think - oh, how marvellous, I have something to blog about, despite not finishing anything this week.  The finished object in question, is Spectra, by Stephen West.

Spectra 03

I initially posted about this project in August!  I really enjoyed knitting this scarf, and my only regret about the project is that I didn't buy two skeins of Count Cashmerino Sock from Countess Ablaze.  The skein was only 350m long, instead of the pattern recommendation of 384m, which meant I ran out of yarn before the end of the scarf.  It was totally my own fault.  I simply didn't register the length of the skein when I pulled it out of the stash.  The yarn was divinely soft and the subtle shades of grey are beautifully elegant.  The contrast of the subtle grey of the Count Cashmerino and the vibrant Noro Silk Garden Sock works wonderfully well.

Spectra 05

The scarf is nice and broad and covers right across my shoulders and upper back.  It provides lots of extra warmth.  I love how the garter stitch edging stretches so there are no taut sections pulling against the skin.

Despite the scarf being slightly shorter than recommended, it is more than long enough for me.  The colours sing to me in the dark and dismal days of Winter, wrapping snugly around my neck and shoulders to provide warmth on cold, grey days.

Spectra 04

I love this scarf and it never fails to make me smile when I put it on.  I highly recommend this as a project to get over a fear and dislike for intarsia.  I think I will approach intarsia with a slightly lighter heart than before I knit this scarf.  Stephen West is a very clever designer who always gives you a pleasurable and interesting knit.

A quick reminder to go and vote on the KAL hat pattern from earlier in the week.  I will make a choice based on the vote on the blog, and on the Ravelry Group, on Monday.  If you want to join in, go and join the group and I'll make an announcement about how to obtain the discount when the pattern is decided.

To see other finished projects, click on the button.

FO Friday Button

Friday, 28 December 2012

A Christmas Gift

I am finally able to share with you the finished pictures of the shawl I knit for my Mum's Christmas present.   My Mum has always said that my Lily's Slice of Pi Shawl is the nicest thing I've made.  She adores it.  She has obviously been hoping for one herself.  One slight problem is her allergy to lanolin.  She can handle wool but if it rubs on anywhere like her neck or wrists it would flare up in a painful rash.  This is obviously a problem.  I solved it by going Posh!  I treated my Mum (and myself as the knitter) to some Posh Yarn Audrey Lace.  It was delicious.

Posh Yarn 03.jpg

The yarn is comprised of 60% silk and 40% cashmere so it is supremely soft and has a glorious sheen to it.  I've have never knit with anything nicer.  It was a pleasure to knit this shawl from start to finish.  This yarn really seemed to suit the pattern and it turned out beautifully.

Posh Lily's Slice of Pi 11

You may be able to see a slightly variation in colour on the edge of the shawl.  That is because I ran out of yarn.  I knit the ruffle until all the Audrey was gone and then I used some GarnStudio Drops Lace to knit the garter stitch edging, as I told you about in a previous post.  I think it works really well, and has given the ruffle some of the depth I loved in the original, even if it didn't quite reach it.

Posh Lily's Slice of Pi 07

It's been really hard to photograph this project, to it's best advantage, because the light in the UK at this time of year is poor to say the least.  But, I hope some of these convey how much I LOVE this yarn.

Posh Lily's Slice of Pi 06

I do enjoy knitting this pattern, and this project was definitely worth the repeat of knitting it, for the expression on my Mum's face when she opened her Christmas present.  I do believe there may have been a hint of a tear in her eye.  I think this will be the last one for a long time though as I want to work on my new patterns.

Posh Lily's Slice of Pi 05

One other thing knitting this shawl did give me, was the experience of working with some gorgeous yarn.  It was so gorgeous, I had to buy some for myself! Now, what to knit with it?

Posh Yarns Audrey 04

To see some other finished projects, click on the button.

FO Friday Button.jpg

Friday, 21 December 2012

Double The Monsters - Double The Fun

Today I took some photos, to show you my completed Made Up Monster.  I realised, as I started to prepare for this post, that I hadn't blogged about Baldwin being finished!  So, of course I had to make this a double monster post.

I shall start with Baldwin.  Baldwin has turned out to be a very sweet, but fierce monster.

Bathroom Monster 08

Just look at those fangs!!!  This monster is actually going to the recipient of my first monster.  I thought Baldwin could be a little brother for Hugo.  I had originally thought to give Baldwin to my other nephew, but when I saw Baldwin all finished, I knew he belonged on the same shelf as Hugo.

I used the same felt and eyes for Baldwin as I did for Hugo.  I love how three dimensional it makes the face look.

Bathroom Monster 07

I did make a couple of tiny mistakes on this monster.  I added an extra stitch, somehow, to the first arm I knitted, so I added an extra stitch on purpose to the other arm to make them match.  There is very little difference between 9 stitches round and 10.  I also attached one of the arms the wrong way round.


The photo on the left has the curved part of the hand facing outwards from the body and the photo on the right shows the curved part facing towards the body. I had a look at un-attaching the relevant arm, but I couldn't find the right yarn strand to pull to get it undone.  I decided it was better to leave it than risk ripping the whole monster apart.

Bathroom Monster 04

This photo helps you get an idea of scale.  Baldwin is a hand sized monster, which I hope will make him easier to transport on journeys away from home.

So having made this little monster for one of my nephews, I had to make another one for the other.  I decided to wing it, as I told you on Wednesday.  I am so pleased with the outcome!  Please meet my made up monster.  I have yet to name him.  Has anyone got any ideas?

Made Up Monster 01

Once again, I used my thick white felt for the face.  This time I added the felt to form the white of the eyes.  I also used separate fangs.  Adding the 12mm safety eyes to the felt means, this monster looks slightly boss eyed.  I think that, along with the wide spaced fangs, makes him look very endearing.

Made Up Monster 02

This guy has turned out to be pretty rotund.  In fact, I ran out of toy stuffing!  After a brief panic which envisaged me having to grab a taxi into the city centre to buy more supplies, I have a flash of inspiration.  I had bought lots of wool fibre to practice spinning on - I could use that.  So my tubby little monster is half stuffed with polyester and half stuffed with merino!

Made Up Monster 04

I was typing up the pattern as I went, but as the deadline started getting nearer and nearer, I stopped and just crocheted like fury.  I may try and make another one at a later date, when I'm under less pressure, and I'll finish the notes then, if people are at all interested.

I've decided to let my monsters hang out for a while before suffocating them with wrapping paper.  They look pretty good together, don't you think?

Made Up Monster 05

To look at other people's finished projects, click on the button.

FO Friday Button.jpg

Friday, 14 December 2012

Entrelac Cowl Number 2

I have been finishing Christmas gifts left, right and centre over the last couple of weeks.  I haven't blogged about them so I will eke them out over the next few Fridays so I have something to talk about over Christmas, other than how tired I am from all the travelling!

This first finish is for my friend who admired my Infinity Neck Warmer which was a pattern from a Craftsy Course with Gwen Bortner on entrelac knitting.  I really enjoyed making the original cowl so it made sense to revisit the pattern for my friend.

I wanted to use lovely yarn so I got some Araucania Aysen in grey.  This semi-solid yarn is what I used to crochet my Quick & Easy Mitts.  I love that I got a great gift out of these two skeins plus a little treat for myself.

Araucania Aysen 01

I think this colourway will really suit my friend and it is wonderfully soft which makes knitting it much more fun!

With this version of the cowl I practiced knitting backwards before casting on.  I quickly came to the conclusion that knitting backwards was slower than purling, but quicker than having to turn the project every 10 stitches or so.  The stocking stitch with backward knitting has created a nice even fabric, so I was happy to use the technique and will continue to do so with other entrelac projects, and possibly when knitting on borders, which are also narrow pieces that need frequent turning.

Infinity Cowl in Grey 03

I adore the lovely woven texture of entrelac, especially with this yarn.  The inside looks almost as pretty as the outside.

Infinity Cowl in Grey 01

As with the previous version of this cowl I haven't blocked it.  The fabric is neat enough that it doesn't need pulling flat.  Leaving it unblocked means the folds of the "blocks" pull the cowl inwards towards the neck, keeping it cosy.

Infinity Cowl in Grey 05

With this cowl I added an extra row of units, to make it possible for the cowl to be pulled up around the ears, like this very unflattering photo.

Infinity Cowl in Grey 06

As we have had a couple of really cold Winters in the UK in the past few years, and it already seems to have started, this extra row of units may well come in useful.

If it isn't as cold as to require an unflattering look, the cowl can be folded over to give a really smart look.

Infinity Cowl in Grey 04

I am so pleased with this cowl and I hope my friend will love it as much as I do.  I have been very firmly converted to the cowl.  They are a wonderful invention and I can see myself making many more.

As usual, I am linking this post up to FO Friday with Tami.  Click on the button to have a look at other completed works.

FO Friday Button.jpg

Friday, 7 December 2012

Little Grey Mitts

One of the selfish projects that I told you about on Wednesday, was finished in two days.  I was inspired earlier this week by the sudden drop in temperature.  My hands really suffer from the cold, sometimes when the rest of me feels quite warm.  I think it's a side effect of some of the drugs I take, because my feet suffer too, to a lesser extent.  As my hands were really painful with cold, I wanted a quick fix to sort things out.

I looked around and saw the left over yarn from a cowl I made for my friend (which once again I haven't blogged about, I really must catch you up!).  The yarn I used was Araucania Aysen.  It's a merino/alpaca/silk mix and it is aran weight.  It is gloriously soft and incredibly warm.  The left overs seemed perfect for some mitts.

I grabbed a 4.5mm crochet hook and got going.  I made these.

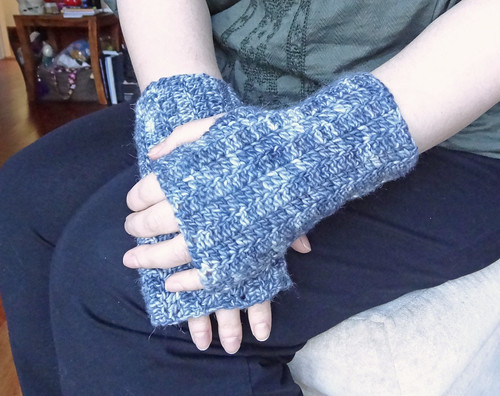
Grey Mitts 01

They are so lovely and warm that I can't believe I didn't do this before!  I also can't believe how quickly they worked up, but they are just a flat piece sewed up the side with a gap left for the thumb.

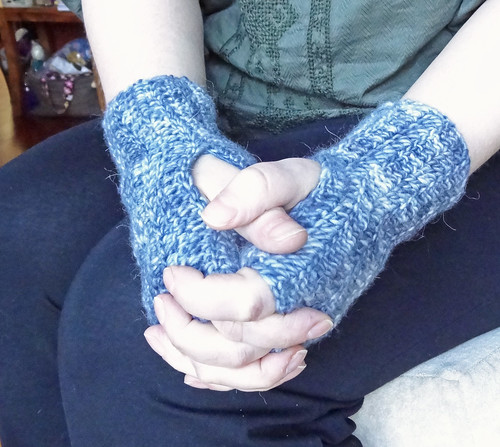
Grey Mitts 03

If anyone is interested in how I did it, here it goes:

I used around 50g of this aran weight yarn which equates to approximately 90yds/97m, and a 4.5mm hook.  I've used the abbreviation DC to indicate a US double crochet.  In UK terminology this equates to a treble stitch.

  • Ch31, turn DC into 4th loop back and DC into each chain until the end of the row. Ch3 turn. 
  • DC into 2nd DC, from the previous row, back. DC into each following DC for the rest of the row. 
  • Repeat last instruction until 18 rows are created and then cut the yarn leaving approximately 12" before pulling it through the last live stitch on the hook. 
  • Match together the top and bottom edges of the rectangle (the top being the edge just worked on and the bottom being the beginning chain row). Using a tapestry needle threaded onto the long piece of yarn, whip stitch over edge to edge for 12 DCs, ensuring both the starting stitch and the finishing ones are secure by sewing over them several times. 
  • Run the yarn down a further 8 stitches, by whip stitching over only one of the edges, and then secure the next stitch with the matching one on the opposite edge, by looping over both stitches several times before using whip stitch over both edges to the end of the row. At the end of the row secure the stitch by duplicating it several times.
  • Run the yarn through the fabric of the mitts in two directions to ensure it is anchored before trimming. Sew in the starting tail of yarn in the same way.

And there we have it.  A a pair of warm and soft crocheted mitts to stop my hands freezing while I type.  To be honest, I've put the instructions here so that I can do it again if I need to, without having to work it out again before I start!

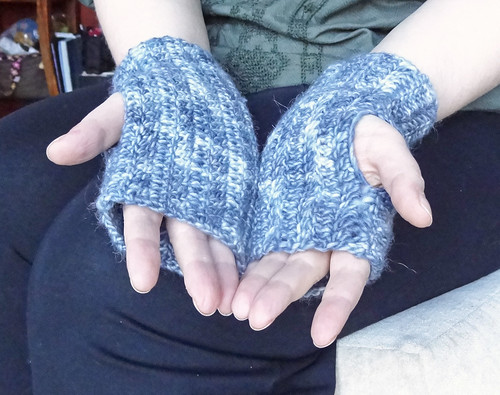
Grey Mitts 02 

I'm sharing this with FO Friday, which you can check out by clicking a button.

FO Friday Button.jpg

Friday, 30 November 2012

I Have Yarn!

Actual yarn is gracing this blog today.  Honest to goodness home spun yarn - I am such a happy blogger!  Look what I made!

Romney 01

The Romney fibre is beautifully soft and has created a plump and springy yarn.  I think this fibre is one I would enjoy working with again, particularly after more practice, because it will be nice to kit with.  As I only have approximately 33m of yarn I don't think I'll be able to knit much with it.  But it would be nice to have a small swatch to show how it knits up as a fabric.  I want to learn about how fibre behaves and I think spinning will inform my future knitting decisions.

As the yarn is my first attempt there are lots of places where the spinning is inconsistent with very tightly spun and very loosely spun next to each other creating a thick and thin yarn which varies between 11 and 9 wpi.

Romney 05

I also think I overplied the yarn and this helped contribute to the limited length of the yarn.  My drafting technique definitely improved throughout the course of spinning this fibre, so hopefully my next attempt will be better.

The above photos are a bit inaccurate colour-wise because of the light, but this next photo is much more true.

Romney 02

I am pleased with this first attempt and I really enjoyed making it.  So much so, that I ordered 200g each of Falkland , Merino and Blue-Faced Leicester to practice on and discover how different fibres feel.  I have ordered from World of Wool which seems to have a good selection and the prices were acceptable to me.  I have no idea really what tops should cost, so I can only go on what I am prepared to pay.  If  anyone has any other recommendations for UK sources of fibre, please let me know.

I settled on my selection of fibres after asking Twitter, and from comments left on the last post.  I think these fibres will be interesting to play with and you never know, by the time I've got to the end of the fibre, I might have useable yarn!

I'm hooking up, as usual, with Tami, so click the button to check out other people's lovely things!


FO Friday Button.jpg


Friday, 16 November 2012

I have a new hat!

It's true, I have a new hat.  It is lovely and green and has a peak!  It is my finished Camden Cap by Woolly Wormhead from Classic Woolly Toppers, that I told you about a couple of weeks ago.  This pattern is the one shown on the cover of the book, and is the main reason I bought it, though I also have my eye on at least one other pattern in the immediate future and other hats from it down the line.

The reason I wanted to make this hat is the peak.  The peak is also what caused me the only trouble in the pattern, and that was purely down to me not looking at the pattern properly.  If you make this pattern listen to me - READ IT PROPERLY BEFORE BLOCKING YOUR PEAK!  Public Service Annoucement over.

I blocked my peak in this shape.

Cambden Cap 01

What I should have done, is blocked it in a wider and more elongated shape, as is illustrated in the pattern by the shape of the template you should be cutting out.  It wasn't too much of a problem in the end, but I think the drawing the correct template outline would have been easier if the peak had been blocked in the right shape.

Once I got my plastic peak cut out of quilter's template plastic I then inserted it into the peak pocket.  I have to say, this is the fiddliest bit of the whole hat.  You knit the pocket together using a three needle bind off and the plastic constantly tries to escape while you are doing so.  Once this bit was done, however, the hat flew off the needles, which resulted in this:

Cambden Cap  05

I love the yarn I used, Malabrigo Rios in Lettuce.  It's not quite so soft as the Malabrigo Worsted, but it is superwash so it won't felt in the rain.

I really like the look of the twisted rib that is used throughout the hat, but it is forced apart on the band above the peak.  This is because of the insertion of additional stitches between the rib at the top of the band to make the body of the hat larger.  This means the band is less elastic and doesn't hug the head as much as I would like.  I am tempted to weave some elastic thread into the back of the band stitches, like I did here, to increase the grip around my head, as I don't want to loose my hat in a stiff breeze!

Cambden Cap  02

But apart from the slightly loose hat band, I love this hat.  It's a lively colour to cheer me up in the cold weather and it is light but warm.  Not only that, it keep the rain off my glasses, which, in my opinion, is very important in Winter.

Cambden Cap  03

It keeps my ears and head warm and it's quite flattering.  What more could a girl want in a hat?  I think next up I'm going to knit the Sumner pattern from this book.  I have some BabyLongLegs BooSock that will suit it nicely.

Boo Sock

I think the beanie shape of Sumner will provide a nice contrast to the peaked Camden Cap, so I shall have a hat for all occassions this Winter.

To see other finished work, please click a button.


Photobucket

LinkWithin

Related Posts with Thumbnails