
I found a couple of inspiring tutorials:
Thimble - Things to Make & Do used a piece of elastic to hold things together, and had zipped pockets to keep things safe and sound.
Five Little Crafty Birdies had a nice cut away on the corners that I liked.
I sort of mashed up the two wallets to come up with my own that would fit the things I needed to take. I'm sure I saw another tutorial recently but I can't find it, can't believe I didn't make a note of it, anyway it was from that one that I got the idea of nice curved corners being made on the individual pocket sleeves.
I used stash fabric that I'd almost forgotten I had. Don't you love it when that happens. That's when you know you have a stash. I love that my sewing cupboard now has most of the supplies I need in order to whip up a little project without having to plan in advance.
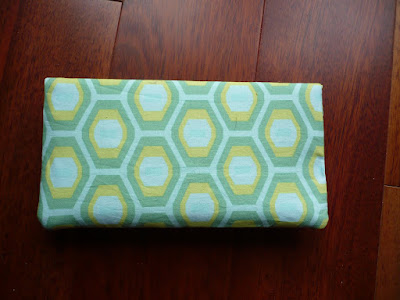
Continuing my recent run of green, and to match the bag I'm taking away with me, I chose this lovely fabric.
You can see from the above and following pictures why I want a new iron, the one I have is appalling. I have some birthday cash to put towards this purchase but I won't buy it until I get back from my holiday. Hopefully you will see a marked improvement in the finish of my sewing projects.
I made the wallet just big enough to hold, in it's largest pocket, A4 paper folded over into thirds, in the way a letter is folded. This is to take the paperwork relating to insurance and holiday details. On top of this opening is a sleeve to take the plane tickets, and boarding passes when we get them. The smallest sleeve on the right hand side is to take the passport.

This is what it looks like when it is loaded up with goodies.

I didn't use any interfacing, but I did layer thin wadding between the outer layers. When there is nothing inside the wallet it has no structure so it will fold away easily when not in use. The paper held by the wallet give it strength and stability.
On the right hand side of the wallet is a sleeve that has two sections and a zippered pocket on top, which also has two sections. I subdivided this sleeve so that a room key or credit card could be held inside the wallet. Notes can be slid inside the larger slot. The zippered sections can be used for coins or other bits and bobs.

The wallet is held together with a strip of elastic that is attached via the seams, so it can flip out of the way easily. I want to be able to get into my wallet quickly without worrying about my stuff falling out the rest of the time.

The thing I like the most about this project isn't how pretty it is, or how well it has come together, it is that it exists at all. 12 months ago it would never have occurred to me to make a travel wallet. I probably would have bought one if I really wanted one, but I never would have thought to "whip one up". It took me a couple of hours to make, but most of that was thinking time. I know that every time I stitch something it is getting easier and easier, and I am making fewer mistakes. I like this project because it is a mark of progress in my stitching career. It is one of the first things I have made because I wanted something and knew I could work out how to make one. That is what I like most about this project.
I hope over the next 12 months or so there will be even more sewing on this blog, as I learn more techniques and try out new processes. I'm sure I will make some disasterous mistakes, but I plan to keep trying hard to learn this new interesting, useful and beautiful craft.