I have only been knitting on two things this week, one is a test knit that I have finished, which I will share on Friday, and the other is the ever gorgeous Melia. For those that don't remember, Melia is the first project on my Challenge To Myself AND Knit The Queue 2013. One project ticks both boxes. It's quite sad that it's such a big project to start off both quests, as it is going to take quite some time to finish, but I am loving every minute of it! You can see how much further I've got since my last update.
You can begin to see more clearly how the clever hood construction works now.
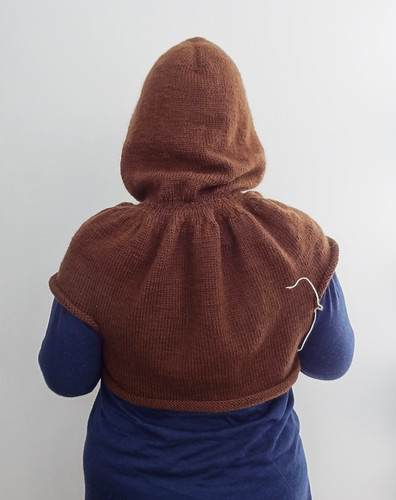
The rows of increases after the hood shaping gives the garment lots of room at the back, to create (what will hopefully be) a flowing and roomy cardigan/jacket.
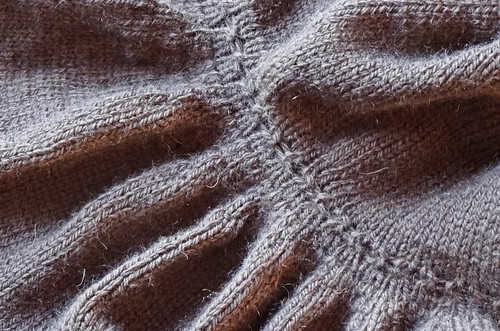
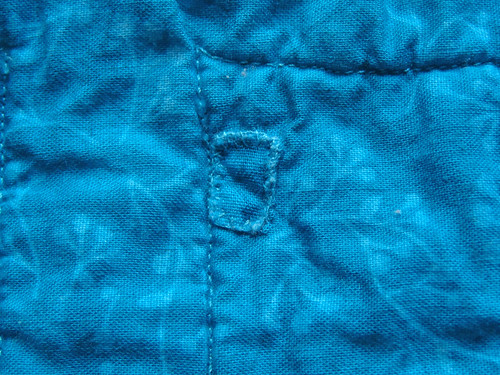
I think knitting on the cable border, as the garment is knit is a very good idea. It saves having to do a huge long pick up of stitches at the finish of the garment, but it also creates a lovely smooth transition from the decreases of the hood shaping to the increases of the body of the garment. If the border was added at the end of kntting the body of the garment there probably would have been gaps at this point. Instead we have this:
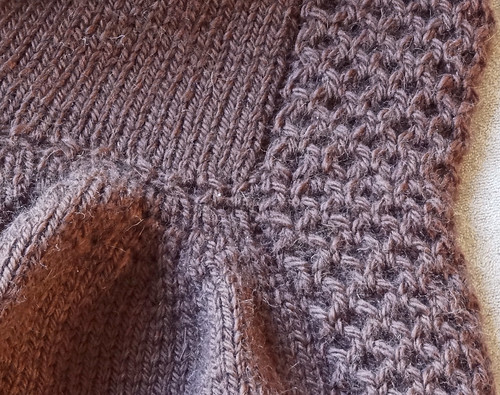
Obviously, working a border this way wouldn't work in all cases, but in this one it does. I think Ysolda Teague shows how carefully she designs garments throughout this project. She uses the right technique, in the right place, to create the right effect in the easiest way. You could see this in the hood shaping at the start of the project. You can also see it in the increases in the body of the garment. The increases after the hood shaping are done by knitting into the front and the back of the stitch. This is a simple and quick method of increases, but it isn't invisible. This isn't a problem at this point of the garment because there are lots of increases made closely together, so the individual stitches are hidden in the folds of the knitted fabric. Later in the body of the knitting there are increases made before the armholes are created.
The increases are made almost invisibly. The stitches flow out elegantly from the body into the arms. This is done by using a LLI and RLI (as Ysolda abbreviates it to). This isn't the best increase for all situations as it can show a little gap alongside the stitch the increases are made from, but in a fabric as dense as this (it's knit at a dense gauge) as the body moves into the arm, it's an elegant solution. Knitting Daily has good diagrams, and there is a good YouTube Video to explain this technique.
NEWSFLASH
I have just come across the Pattern Errata for the PRINTED version of this book. It made me double check the PDF I printed off to use. It seems that though I bought the printed copy from Ysolda's website in order to get the PDF version of the book, and all the updates on Ravelry, the digital files on Ravelry had not been updated to reflect the errata that was listed on Ysolda's website as being in the PRINTED version of the book.
On Ysolda's website, it states the current digital version is 1.3, but on Ravelry the most recent version available is 1.2. The single pattern for Melia is listed as being v1.1 and in none of the available digital copies have the column headings changed on the charts for determining stitch and row counts. This means that all the little numbers of stitches and rows I worked out to make this garment fit me perfectly are 2" out. Is it wrong of me to assume that getting the most up to date digital versions of a pattern, on Ravelry, will ensure I have the most up to date pattern available and that it will have been amended the to include the errata from the printed version that were listed on the website? It seems to me to defeat the object of having a digital version on sale.
I also found reference to this errata on Ravelry in a thread **19 months ago, so it's not like there hasn't been time to up date things!!
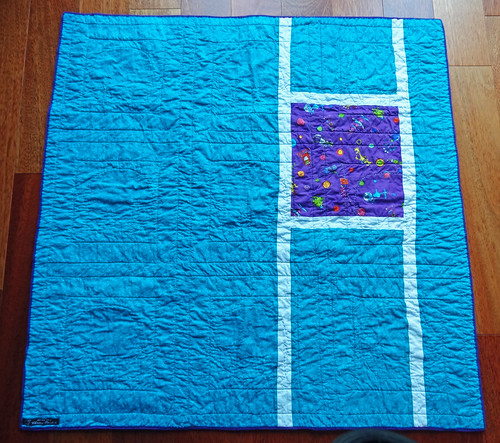
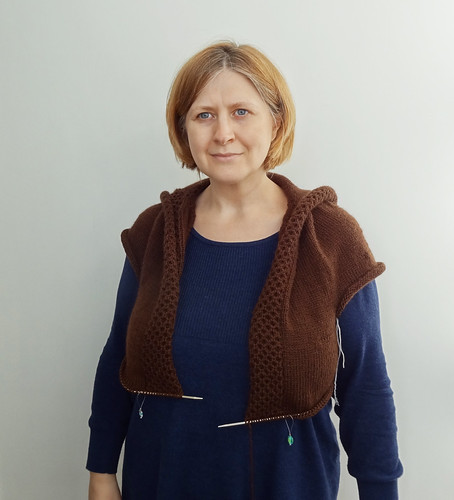
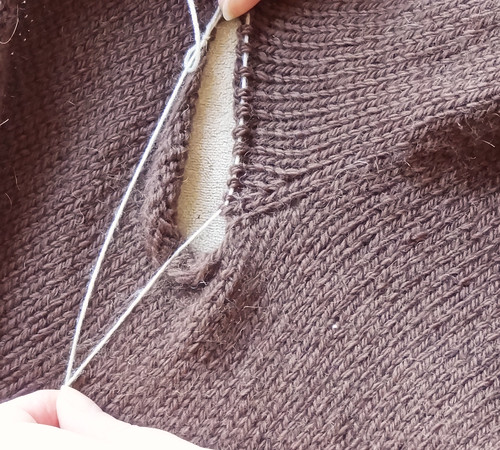
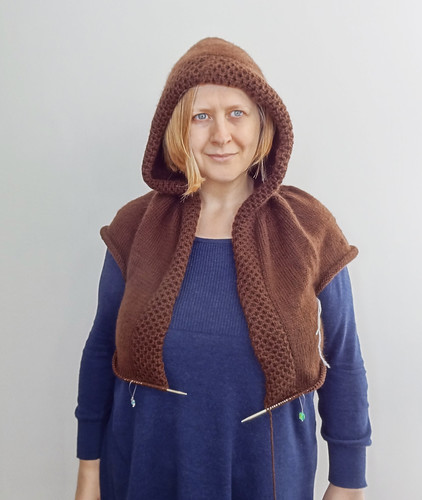
I am now going to have rip out all the work I've done from the hood downwards because my maths is wrong based on the column headings. I love this pattern dearly and I WILL recalculate and revise the pattern, rip it back and re-knit it, but I really shouldn't have to. It shouldn't be this hard! I'm so upset about this because it such a lovely garment, but looking at the picture below, I really need to do this, because it is gaping at the bust, more than can be explained by trying on the garment with the knitting needle still in the working edge.
So I'm now going to crawl under my comfort blanket and cry for a bit before going over the pattern again and seeing if I can avoid going all the way back to the increases after the hood, because I'm not undoing that as it looks pretty good. Hopefully by this time next week I'll have stopped sobbing and got back on track. I'll keep you posted!
To see people who are going forwards instead of backwards, click on the button.
Wednesday, 30 January 2013
Sunday, 27 January 2013
Tropical Treasury
I had some fun this weekend. I made my first ETSY Treasury. I tried to cheer myself up with some lovely bright colours. It was good fun being a collection curator for a while. It's certainly a good way to eat up your time!
Tropical hues for the knitter or crocheter. Jewellery, accessories, decor and raw materials.
If you fancy having a go, iMake has done a really good post about how to do it. It's great fun, I recommend it!
'Fiberista's Tropical Hues' by Stitched Together
Tropical hues for the knitter or crocheter. Jewellery, accessories, decor and raw materials.
![]() Ceramic Yarn Bowl Robin'...
$36.00
| ![]() Jersey Loop Infinity Scarf -...
$28.00
| ![]() bracelet with neonpink jerse...
$29.00
|
![]() Tiny dangle earrings- black ...
$12.00
| ![]() Super wash Merino Cashmere N...
$30.00
| ![]() Beach Bum- Turquoise, Mint, ...
$20.00
|
![]() Hot pink, turquoise, and lim...
$22.00
| ![]() Arizona Hand Painted Sock Ya...
$25.00
| ![]() Crochet earrings made on coc...
$10.00
|
![]() Yarn Wreath Handmade Front D...
$35.00
| ![]() Turquoise Handspun Art Yarn ...
$16.00
| ![]() Colour Block Bracelet in Neo...
$22.00
|
![]() Multi color Turquoise yarn F...
$34.00
| ![]() Neptune's Reef - Romney ...
$16.50
| ![]() Hot pink and orange - nursi...
$35.50
|
![]() Bright felt flower arrangeme...
$28.00
|
Treasury tool supported by the dog house
If you fancy having a go, iMake has done a really good post about how to do it. It's great fun, I recommend it!
Friday, 25 January 2013
My First Quilt
I am so damned proud of this FO. It is my very first finished quilt. I might have started it months ago, but I finished it! It is, of course, my Cirque d'Elephant Quilt, designed by Sew Much Ado.
I hate that these pictures are so washed out, but it iscaused once again by the weather we are having in the UK. I think the pictures from this post show truer colours.
In a way I wish I hadn't pressured myself to finish this quilt in time for Christmas, because left to my own devices I'd still be hand quilting it. I enjoyed hand quilting around the elephants in the beautiful turquoise perle thread so much, I probably would have ended up hand stitching with it all over the elephants bodies too! That probably wouldn't have looked so great because of the heat'n'bond stiffening the fabric. If I'd carried on filling the white areas, it might have been more successful.
Other than the hand quilting I machine quilting in straight lines 1/4" inside each of the coloured fabric "frames" around each elephant. I used a walking foot, which helped, but there were still areas of puckering. Mind you, those areas seem to have disappeared in the wash and tumble dry!
On thing that didn't completely disappear was a bit of the backing fabric that got ripped when I was ripping out a wonky seam. After practically crying with frustration, I got my thinking cap on and used a tiny scrap of the trimmings of the backing and ironed on fusible interfacing to give it strength and sewed it over the hole in the fabric. I'm pretty proud of how well it is hidden.
To be honest, it took me ages to find it photograph, and I knew it was there. You can see the Aurifil 50wt thread I used for quilting in the above photo. I'm pretty happy with the colour choice and I loved using this thread. It was a dream to sew with. You can see the shape of the quilting better on the back of the quilt.
After the disaster of not having enough fabric to have a single piece for backing, I love the way it looks. It was extra effort, but the "window"on the back with my favourite piece of fabric on the quilt is great. Can you see the little black label on the bottom left hand corner in the photo above?
I thought of doing a proper embroidered label, but time caught up with me and I decided to just used the labels I already had for other sewing projects. The fabric in the window was this one.
Who could resist those cute aliens, who wish for Galaxy Peace?
Over the course of making this quilt, the thing that caused the most problems was the binding, as I explained in this post. In the end I decided to rip off the spare binding from my test piece and attach that to the end of the binding I had and it just about stretched around the quilt. The binding really was very narrow, but with a quilt this size it didn't mess with the proportions too much. I have got some extra Kona in my fabric stash as a result of my humming and hawing over the binding, but I couldn't face starting again on the binding in the time I thought I had left.
This skinny binding did make for wonky stitches with having to sew so close to the edge of the quilt. Thank goodness for an edge of fabric foot! Because the binding was so skinny and my stitching so wonky, after washing and tumble drying the quilt, the stitching on the binding came away from the main body of the quilt. In a couple of places I was able to anchor the binding back down by hand sewing, but in one section I unpicked all the machine stitching and started again. In the end it was all pretty neat and no one will know it is there but me - and now you!
I am pleased that with all the problems that occurred with this quilt I was able to solve them with the aid of my lovely bloggy friends, the Internet and my own thinking. I can't wait to see my nephew playing with his new quilt, when we finally get to have our very belated Christmas! Yes, sadly I have yet to give away half my made Christmas gifts because we have been delayed in our Christmas visit by illness, weather and holidays.
I really should wrap it up before I give into the temptation to keep it! For other finished objects, click on the button.
Subscribe to:
Posts (Atom)