
I have started work on my first Challenge To Myself project. I cast on for Melia, and straight away hit a snag. The hood sizing given for this pattern requires you to choose, S, M or L, depending on how big your head is. What it didn't give was what S, M or L equated to in specific inches around your head. I made a punt and decided to go for M size. If I'd understood how the shaping of the hood was created I might have chosen differently.
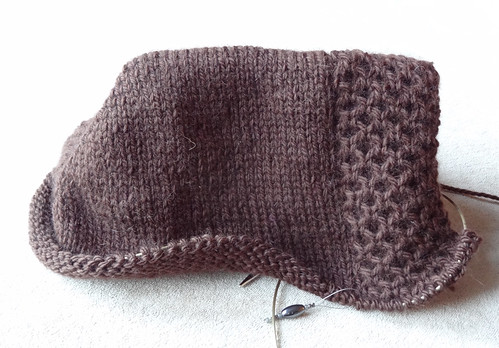
The hood is created by using a provisional cast on. The number of stitches you cast on for the hood creates the spine at the top of the hood, from which short rows create the peak. That spine runs from the front of the hood down towards the back of the head. The short rows start 16 sts back (in my case) from end of the cast on stitches, and work back towards the end of the cast on spine.
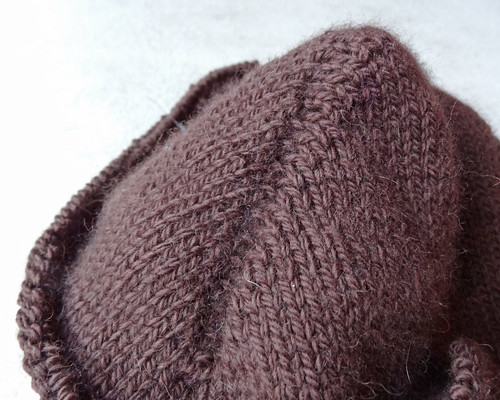
Above you can see the short rows row meeting from both sides of the hood. The hood is created in two parts. One edge is worked and then the provisional stitches are picked up and the other half of hood, using short rows, is worked. This creates a hood with no seam, but it took me a while to get my head around the shaping, because I lost the stitch marker that is placed to mark where the short rows go. It took getting to the end of the short rows to work out I had a very wonky hood. I had to unravel what I'd done and work back to where the provisional stitches were picked up and try again.
Now I've explained how the hood is constructed I hope the sizing will make more sense. In my chosen size M, I cast on 55 sts. At the specified gauge of 18sts over 4", this gives a spine of approximately 12". 18sts of that hood are used in the cabling which pulls that part of the stitches in by about 1". Using that measurement you can line up your tape measure with the back of your head and measure to where the hood will sit, and make a choice about the hood size you want to make.

The hood is a very clever construction, but because I didn't understand it when I cast on, it was easy to make a mistake when I lost my stitch marker. I think I am now back on track. I do love the cable panel at the edges of this garment. It's so soft and squishy and the slipped stitch at the edge pulls the edge around softly and neatly.
Edited To Add: The sizes for the hood are actually on the pattern: S=20", M=22", L=24" These sizes are given on the original sizing page (p.149)
I am really enjoying this project. The yarn is just as beautiful as I initially thought. The very slight fuzz caused by the camel content in the yarn doesn't hide the honeycomb panel or the stitch definition in the stocking stitch body. I think I am going to be addicted to this garment.
During the short amount of time I'm not knitting Melia, I am working on Pterodactyl. I have reached the end of the last grey section and I'm about to start the bottom border.
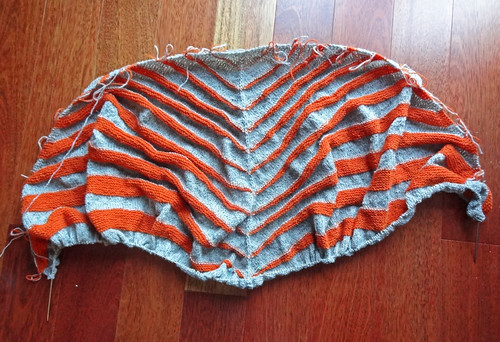
I don't want to finish this project. I have enjoyed every minute of working on it. My only consolation is that I will be able to wear it soon! I was originally going to add a couple of extra repeats of the wedges, but I don't think I'll have enough yarn to do that. Plus I think I was mistaken about the size of this shawl. I think it will be more than big enough to wrap comfortably round my shoulders. I don't know how quickly this project will get finished, as Melia is taking up a big chunk of my knitting time, and I will be casting on for the Knotted Cap KAL in the next day or so. Never mind, it will get finished eventually!