The pattern is knit in DK Weight yarn and I used some very cheap yarn I picked up for a song on eBay. It is Stylecraft Pure Wool DK (Machine Washable). I got 2560m for £15.98 (including delivery). This means that this lovely tunic cost me the grand total of £8.59 - now beat that Tesco! More importantly, because I used this yarn, I can chuck it into the washing machine. This may be useful as I am wearing this tunic a LOT!
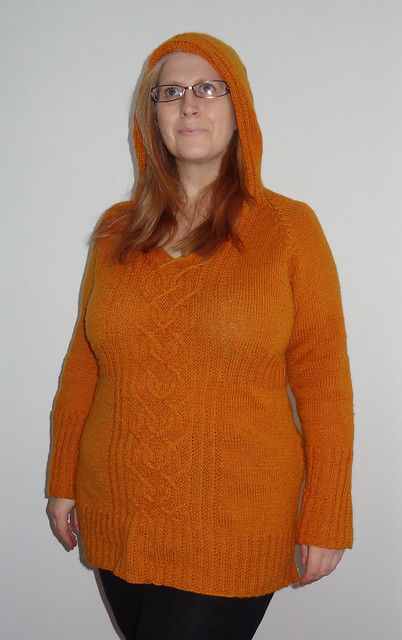
I did take photos whilst knitting this project and I think this one shows the cable panel quite well.
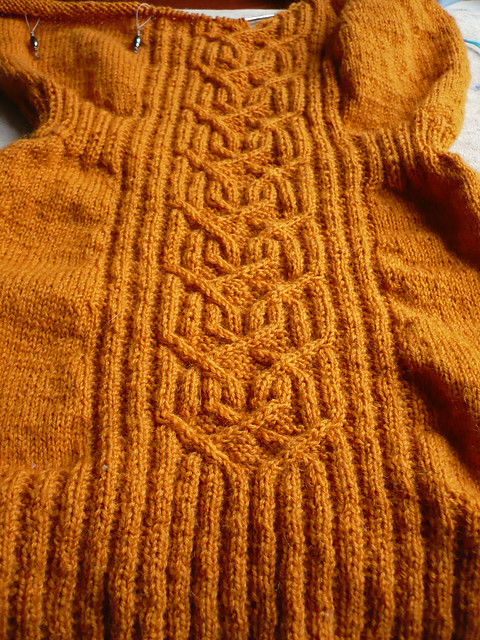
The ribbing on bottom of the tunic is broken, which means it doesn't pull in around the hips and instead skims over them (and covers my bum!). Because the panel extends from the broken rib, the cable is knit over a background of garter stitch and bordered by the continuing broken rib. I love this panel so much and I really enjoyed working it.
I also really like how the cable panel splits to give an almost sweetheart neckline. Which again, can be seen more clearly on a work in progress photo.
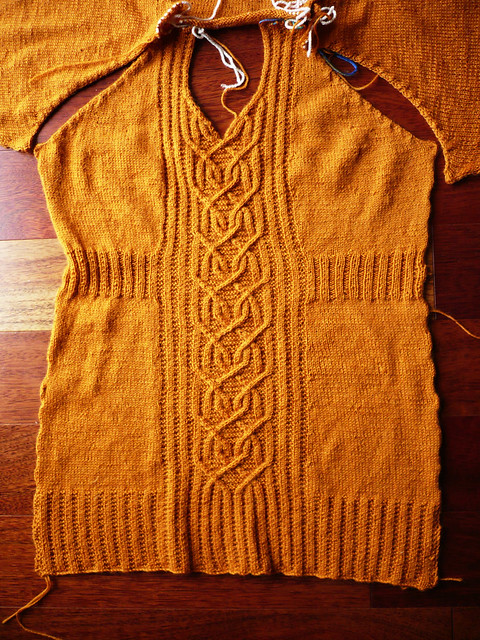
This photo was taken after the pieces were blocked, so the cable looks a bit neater too! The pattern was created from the bottom up in pieces then assembled using mattress stitch, before picking up the live stitches, round the top of the tunic and creating the hood. The hood continues the broken rib from the central panel around the front edge.
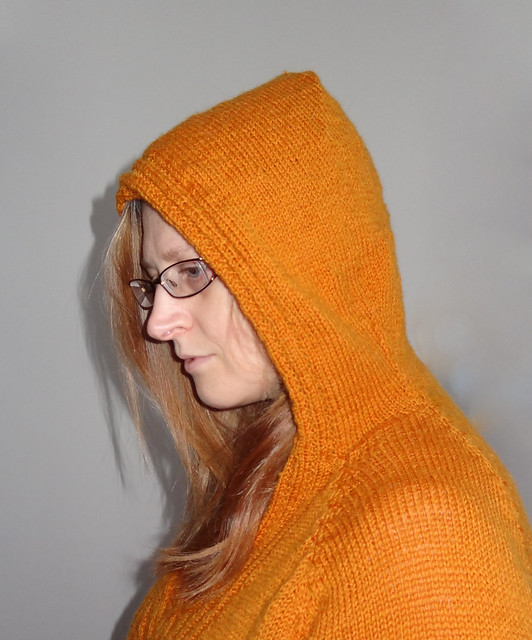
Short row shaping brings the rear of the sleeves up to meet the raised back neckline. It's a lovely detail and makes the shoulders fit beautifully. The hood is joined together using grafting (or 3 needle bind off if you don't fancy fiddling about with a sewing needle!). Personally I really enjoyed the look of the grafted hood, it made it feel more organic, than having a seam would.
For me, the best part about this garment was the bust sizing. As someone who usually has to do short row shaping to get a sweater to hang right it was interesting looking at a different method of creating an increased bust size. Carine provides a worksheet with the pattern, that you need to use to calculate how many increases you need and over how many rows, for your particular measurements. The increases are done above the ribbed band and are spaced out according to your calculations. If you are looking for a simple and quick knit, this probably isn't it, though if you are a B-Cup or less, you don't need to do any maths! The maths aren't that hard to do but it will take a bit of time and patience to work through it properly and to make sure you know what you are doing. Personally as I have to do this most times I knit, it didn't bother me at all.
I can honestly say that despite a few hiccups, that were part of the testing process, I really enjoyed knitting this garment. It has plenty of straight forward bits for mindless knitting and lots of interesting bits to keep you entertained. And most importantly, I LOVE wearing it. I have had so many compliments about this garment, because not only is it a nice looking knit, it also actually FITS! At the end of the day, can you ask for anything more?
If you want to look at anymore finished projects, hit a button!